Virtual Helpers objects(뷰의 배치를 돕는 가상 오브젝트)
지난시간 Part1에서는 ConstraintLayout을 이용하여 기본적인 레이아웃을 잡는 연습을 했습니다. 이번시간에는 ConstraintLayout에서 가상 오브젝트들에 사용을 통해 좀 더 다양한 레이아웃을 만드는 연습을 해보도록 하겠습니다.
가상오브젝트의 종류에는 Guidline, Barrier, Group, Placeholder가 있습니다.
Guideline
뷰의 위치를 잡는데 도움을 주는 유틸리티 클래스로 기본적인 동작은 visibility의 상태는 View.GONE이므로 나타나진 않습니다. 오로지 ConstraintLayout내에서 다른 뷰들의 배치를 돕는 목적으로만 쓰입니
Guideline은 가로 및 세로로 배치 할 수 있으며 기본적으로 사이즈가 0dp 입니다.
사용할 수 있는 속성은 다음과 같습니다.
layout_constraintGuide_begin좌측 또는 상단으로부터 고정된 거리값을 가지고 배치 됩니다.layout_constraintGuide_end우측 또는 하단으로부터 고정된 거리값을 가지고 배치 됩니다.layout_constraintGuide_percent0부터 1까지 float값을 넣어 전체 길이의 비례적으로 배치 됩니다.
아래의 예제를 확인해봅시다.
<?xml version="1.0" encoding="utf-8"?>
<androidx.constraintlayout.widget.ConstraintLayout xmlns:android="http://schemas.android.com/apk/res/android"
    xmlns:app="http://schemas.android.com/apk/res-auto"
    xmlns:tools="http://schemas.android.com/tools"
    android:layout_width="match_parent"
    android:layout_height="match_parent"
    tools:context=".MainActivity">

    <android.support.constraint.Guideline
        android:id="@+id/guide_line_1"
        android:layout_width="wrap_content"
        android:layout_height="wrap_content"
        android:orientation="vertical"
        app:layout_constraintBottom_toBottomOf="parent"
        app:layout_constraintGuide_begin="50dp"
        app:layout_constraintStart_toStartOf="parent"
        app:layout_constraintTop_toTopOf="parent" />

    <Button
        android:layout_width="0dp"
        android:layout_height="wrap_content"
        app:layout_constraintLeft_toLeftOf="@+id/guide_line_1"
        app:layout_constraintRight_toRightOf="@+id/guide_line_2"
        app:layout_constraintTop_toTopOf="parent" />

    <android.support.constraint.Guideline
        android:id="@+id/guide_line_2"
        android:layout_width="wrap_content"
        android:layout_height="wrap_content"
        android:orientation="vertical"
        app:layout_constraintEnd_toEndOf="parent"
        app:layout_constraintTop_toTopOf="parent"
        app:layout_constraintBottom_toBottomOf="parent"
        app:layout_constraintGuide_percent="0.7" />

</androidx.constraintlayout.widget.ConstraintLayout>
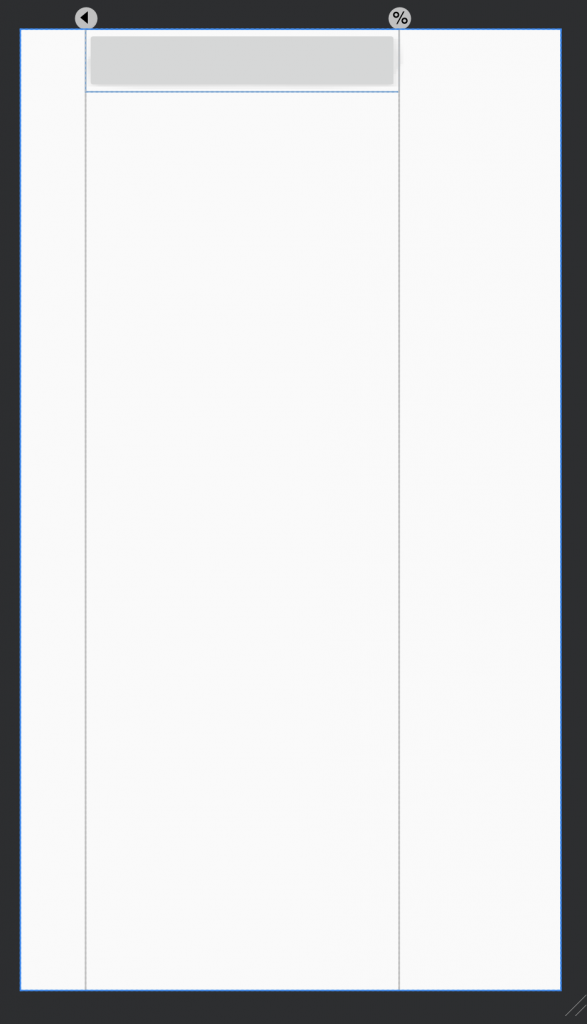
guide_line_1은 수직으로 50dp 왼쪽으로부터 떨어져 배치 되었습니다. guide_line_2는 수직으로 배치되며, 수직으로 배치되었기 때문에 percent값을 0.7입력하면 가로 전체길이 기준으 70%위치되는 지점에 배치되게 됩니다.
해당 Guideline들을 기준으로 버튼의 길이를 늘린 모습입니다.
Barrier
Barrier는 한국말로 번역하면 장벽입니다. 말그대로 장벽을 만들어 그 이상 뷰들이 넘어 오지 못하도록 만들 수 있습니다.
Guideline은 정적으로 수치를 입력하여 고정된 벽을 만들었다면, Barrier는 어떤 뷰들을 기준으로 동적인 벽을 만들 수 있습니다.
Barrier에서 쓰이는 속성은 다음과 같습니다.
barrierDirectionbarrier의 방향을 결정합니다. top, bottom, start, end, left, right가 해당됩니다.constraint_referenced_ids장벽의 기준점으로 참조할 뷰의 아이디를 복수개 참조 할 수 있습니다barrierAllowsGoneWidgets참조하고 있던 true 또는 false 값을 통해 참조하고 있던 뷰가 GONE될때의 동작을 지정합니다.
다음 예제를 확인 해보시기 바랍니다.
<?xml version="1.0" encoding="utf-8"?>
<androidx.constraintlayout.widget.ConstraintLayout xmlns:android="http://schemas.android.com/apk/res/android"
    xmlns:app="http://schemas.android.com/apk/res-auto"
    xmlns:tools="http://schemas.android.com/tools"
    android:layout_width="match_parent"
    android:layout_height="match_parent"
    tools:context=".MainActivity">
    <TextView
        android:id="@+id/tv1"
        android:layout_width="wrap_content"
        android:layout_height="wrap_content"
        android:text="동해물과 "
        app:layout_constraintStart_toStartOf="parent"
        app:layout_constraintBottom_toTopOf="@+id/tv2"
        app:layout_constraintTop_toTopOf="parent"
        app:layout_constraintVertical_chainStyle="packed" />

    <TextView
        android:id="@+id/tv2"
        android:layout_width="wrap_content"
        android:layout_height="wrap_content"
        android:text="마르고 닳도록"
        app:layout_constraintStart_toStartOf="parent"
        app:layout_constraintBottom_toBottomOf="parent"
        app:layout_constraintTop_toBottomOf="@+id/tv1" />

    <androidx.constraintlayout.widget.Barrier
        android:id="@+id/barrier"
        android:layout_width="wrap_content"
        android:layout_height="0dp"
        app:barrierDirection="end"
        app:constraint_referenced_ids="tv1,tv2" />

    <Button
        android:id="@+id/btn1"
        android:layout_width="wrap_content"
        android:layout_height="wrap_content"
        android:text="barrier"
        app:layout_constraintBottom_toBottomOf="parent"
        app:layout_constraintStart_toEndOf="@id/barrier"
        app:layout_constraintTop_toTopOf="parent" />

</androidx.constraintlayout.widget.ConstraintLayout>
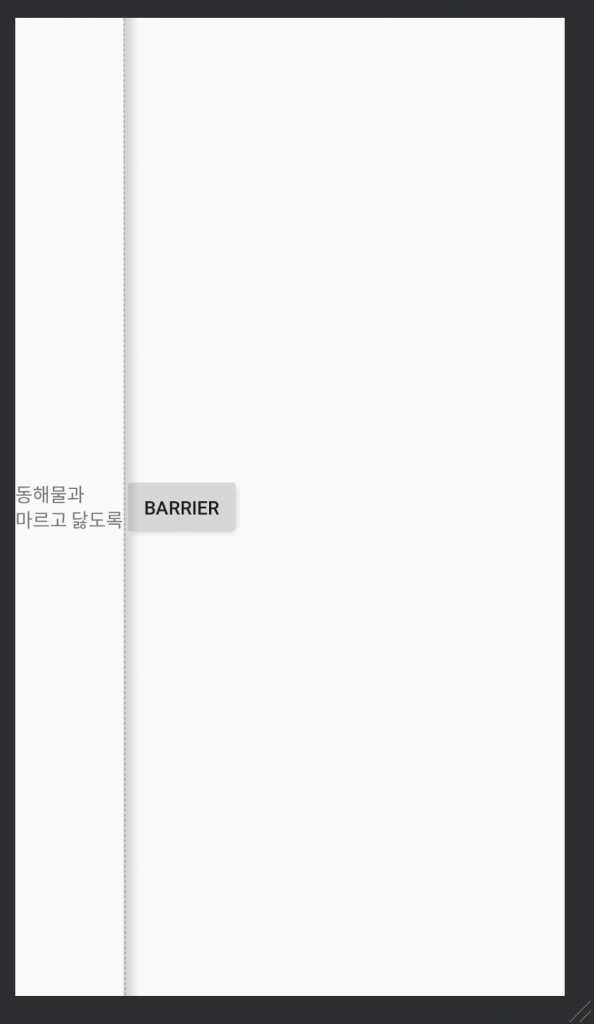
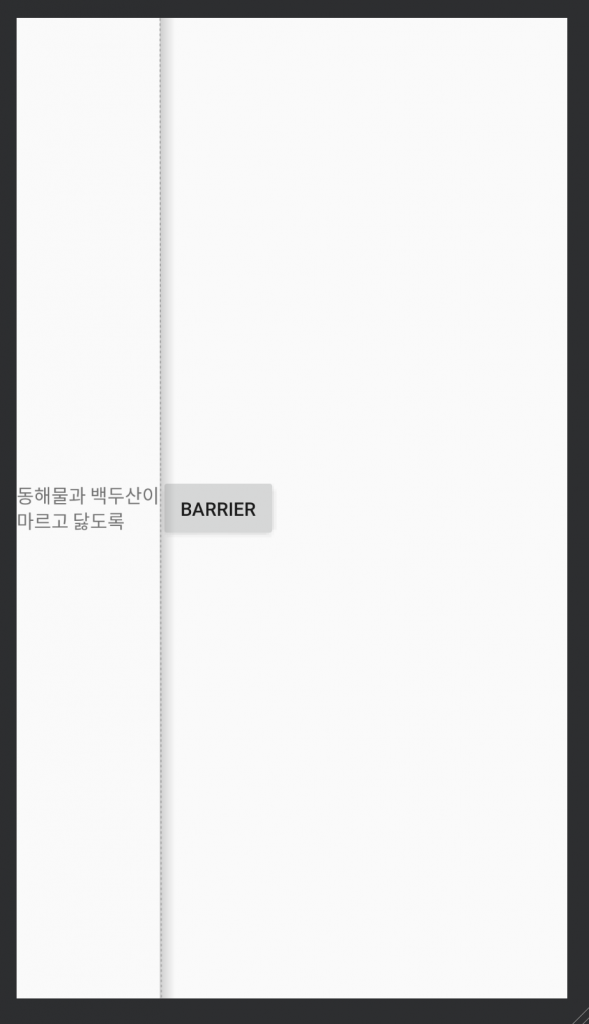
TextView가 두개가 위아래로 packed되어 자리를 잡았고, Barrier는 이 TextView들을 end방향으로 참조하고 있어 그라데이션 장벽이 생긴 모습입니다.(개발자의 이해를 돕기위해 preview에는 나오지만, 런타임에 실제로는 나오지 않습니다)
Button은 Barrier를 기준으로 배치 되어 TextView(tv2) 기준으로 배치가 되었습니다. 왜냐하면 tv2가 더 길이가 길기 때문입니다. tv2 또는 tv1의 길이가 달라진다면 Barrier의 위치도 달라지게 됩니다.
Barrier에서 참조하고 있던 뷰가 사라진다면 Barrier는 어떻게 동작하는지 확인해보겠습니다.
<?xml version="1.0" encoding="utf-8"?>
<androidx.constraintlayout.widget.ConstraintLayout xmlns:android="http://schemas.android.com/apk/res/android"
    xmlns:app="http://schemas.android.com/apk/res-auto"
    xmlns:tools="http://schemas.android.com/tools"
    android:layout_width="match_parent"
    android:layout_height="match_parent"
    tools:context=".MainActivity">

    <TextView
        android:id="@+id/tv1"
        android:layout_width="wrap_content"
        android:layout_height="wrap_content"
        android:background="@color/colorAccent"
        android:gravity="center"
        android:padding="10dp"
        android:text="TV1"
        android:textColor="@android:color/white"
        app:layout_constraintRight_toRightOf="parent"
        app:layout_constraintTop_toTopOf="parent" />

    <TextView
        android:id="@+id/tv2"
        android:layout_width="wrap_content"
        android:layout_height="wrap_content"
        android:layout_marginLeft="100dp"
        android:background="@color/colorPrimary"
        android:gravity="center"
        android:padding="10dp"
        android:text="TV2"
        android:textColor="@android:color/white"
        android:visibility="visible"
        app:layout_constraintBottom_toBottomOf="parent"
        app:layout_constraintLeft_toLeftOf="parent" />

    <androidx.constraintlayout.widget.Barrier
        android:id="@+id/id_barrier1"
        android:layout_width="wrap_content"
        android:layout_height="wrap_content"
        app:barrierDirection="right"
        app:constraint_referenced_ids="tv1,tv2" />

    <androidx.constraintlayout.widget.Barrier
        android:id="@+id/id_barrier2"
        android:layout_width="wrap_content"
        android:layout_height="wrap_content"
        app:barrierAllowsGoneWidgets="true"
        app:barrierDirection="left"
        app:constraint_referenced_ids="tv1,tv2" />

    <TextView
        android:id="@+id/object"
        android:layout_width="wrap_content"
        android:layout_height="wrap_content"
        android:background="@android:color/holo_red_dark"
        android:gravity="center"
        android:padding="15dp"
        android:text="Object"
        android:textColor="@android:color/white"
        app:layout_constraintBottom_toBottomOf="parent"
        app:layout_constraintLeft_toLeftOf="@+id/id_barrier1"
        app:layout_constraintRight_toRightOf="@+id/id_barrier2"
        app:layout_constraintTop_toTopOf="parent" />

</androidx.constraintlayout.widget.ConstraintLayout>

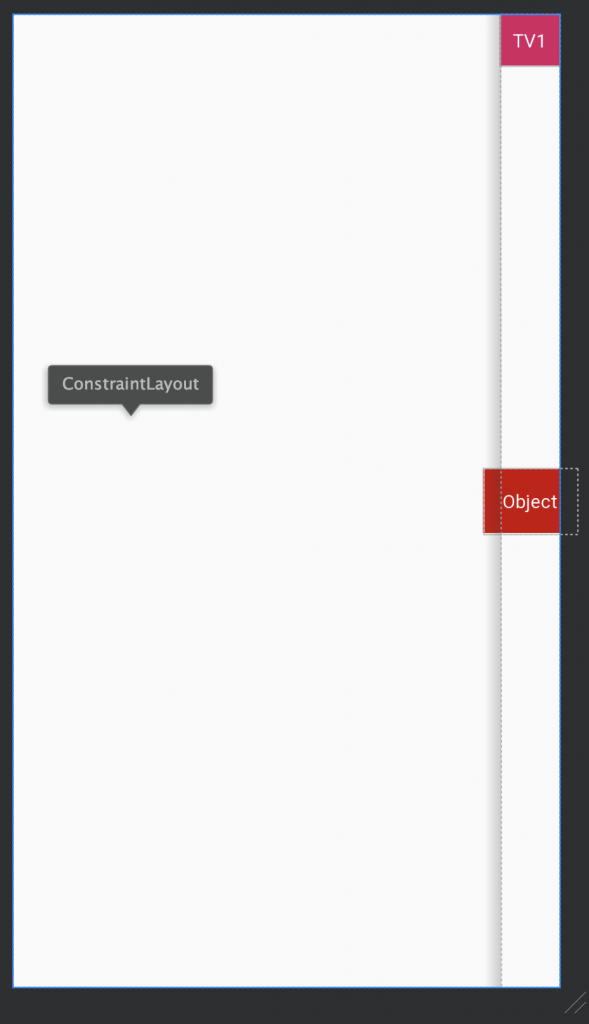
TV1과 TV2를 참조하는 Barrier를 left,right 방향으로 두개 만들고, 그 Barrier들 중앙에 Object를 배치한 모습니다. 이 상태에서 TV2가 GONE된다면 어떻게 될까요?
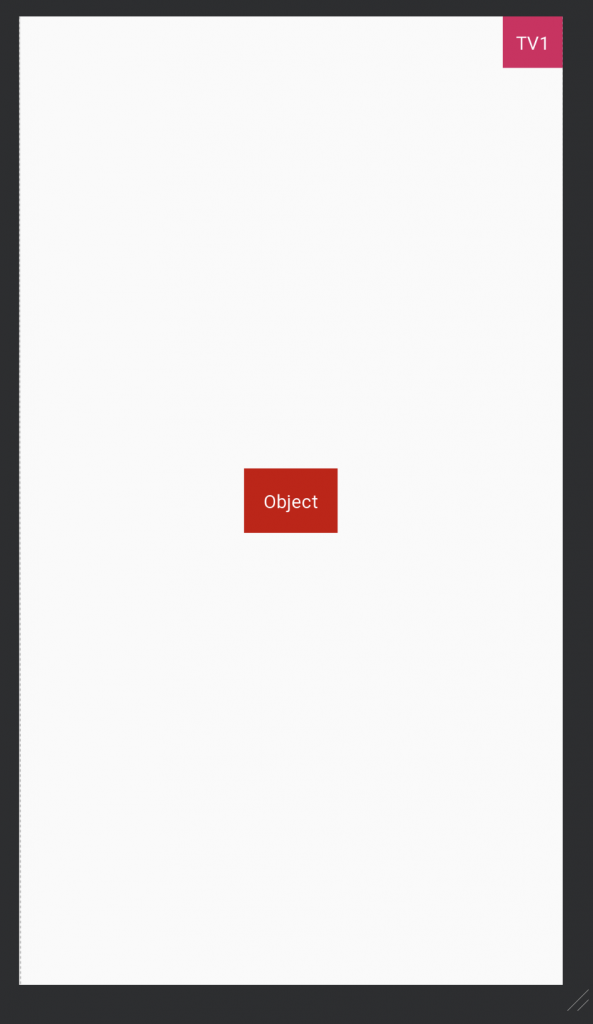
TV2가 없어지면서 TV2의 left방향을 참조하고 있던 Barrier의 위치가 parent인 ConstraintLayout을 참조하면서 object의 위치가 바뀐것을 확인 할 수 있습니다.
TV2가 GONE상태가 될때는 이와 관련한 참조를 끊고 싶을수도 있습니다. 해당 Barrier의 속성을
app:barrierAllowsGoneWidgets=”false” 다음과 같이 바꾼다면 TV2의 참조를 끊을 수 있습니다. 그러면 TV2의 left 기준으로 생겼던 Barrier는 TV1의 left기준으로 위치를 옮기면서 다음과 같은 결과를 나타냅니다.
Group
Group은 여러뷰들을 참조하며, 참조된 뷰들을 쉽게 hide / show 할 수 있는 클래스입니다.
여러 Group들이 동시에 같은 뷰를 참조하여 뷰의 상태를 변경하는 경우 xml에 선언된 순서를 따라 마지막에 적용된 Group의 state를 따릅니다.
예제를 확인해보시겠습니다.
<?xml version="1.0" encoding="utf-8"?>
<androidx.constraintlayout.widget.ConstraintLayout xmlns:android="http://schemas.android.com/apk/res/android"
    xmlns:app="http://schemas.android.com/apk/res-auto"
    xmlns:tools="http://schemas.android.com/tools"
    android:layout_width="match_parent"
    android:layout_height="match_parent"
    tools:context=".MainActivity">

    <Button
        android:id="@+id/btn1"
        android:layout_width="wrap_content"
        android:layout_height="wrap_content"
        android:text="btn1"
        app:layout_constraintLeft_toLeftOf="parent"
        app:layout_constraintTop_toTopOf="parent" />

    <Button
        android:id="@+id/btn2"
        android:layout_width="wrap_content"
        android:layout_height="wrap_content"
        android:text="btn2"
        app:layout_constraintRight_toRightOf="parent"
        app:layout_constraintTop_toTopOf="parent" />

    <androidx.constraintlayout.widget.Group
        android:layout_width="wrap_content"
        android:layout_height="wrap_content"
        android:visibility="visible"
        app:constraint_referenced_ids="btn1,btn2" />
</androidx.constraintlayout.widget.ConstraintLayout>
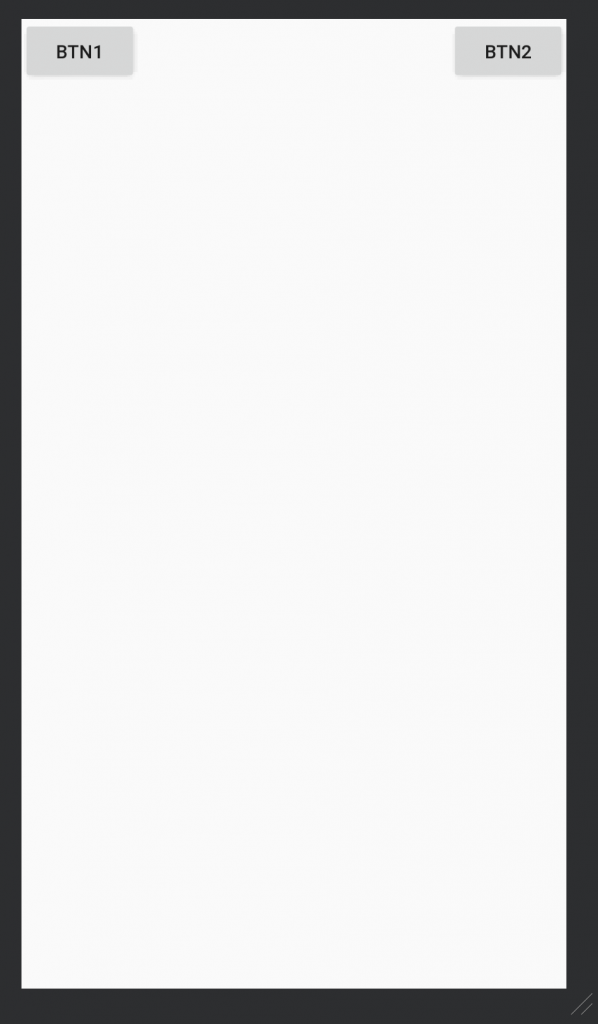
group의 visibility를 변경하여 버튼이 사라지는지 확인해보세요
Placeholder
Placeholder는 이미 존재하는 뷰의 위치를 조정할 수 있는 가상오브젝트입니다.
어떤 뷰의 id와 함께 setContent()메소드를 이용하여 Placeholder에 적용되었다면, Placeholder는 효과적으로 해당 뷰(content view)를 표현합니다. content view로 동작하면 원래 가지고 있던 뷰의 위치는 GONE처럼 동작합니다.
예제를 확인해보겠습니다.
<?xml version="1.0" encoding="utf-8"?>
<androidx.constraintlayout.widget.ConstraintLayout xmlns:android="http://schemas.android.com/apk/res/android"
    xmlns:app="http://schemas.android.com/apk/res-auto"
    xmlns:tools="http://schemas.android.com/tools"
    android:layout_width="match_parent"
    android:layout_height="match_parent"
    android:background="#55000000"
    tools:context=".MainActivity">

    <androidx.constraintlayout.widget.Placeholder
        android:id="@+id/place_holder"
        android:layout_width="wrap_content"
        android:layout_height="wrap_content"
        android:layout_marginTop="100dp"
        app:layout_constraintLeft_toLeftOf="parent"
        app:layout_constraintRight_toRightOf="parent"
        app:layout_constraintTop_toTopOf="parent" />

    <ImageView
        android:id="@+id/iv1"
        android:layout_width="50dp"
        android:layout_height="50dp"
        android:src="@android:drawable/ic_dialog_alert"
        app:layout_constraintBottom_toBottomOf="parent"
        app:layout_constraintLeft_toLeftOf="parent" />

    <ImageView
        android:id="@+id/iv2"
        android:layout_width="50dp"
        android:layout_height="50dp"
        android:src="@android:drawable/ic_dialog_map"
        app:layout_constraintBottom_toBottomOf="parent"
        app:layout_constraintLeft_toLeftOf="parent"
        app:layout_constraintRight_toRightOf="parent" />

    <ImageView
        android:id="@+id/iv3"
        android:layout_width="50dp"
        android:layout_height="50dp"
        android:src="@android:drawable/ic_dialog_dialer"
        app:layout_constraintBottom_toBottomOf="parent"
        app:layout_constraintRight_toRightOf="parent" />

</androidx.constraintlayout.widget.ConstraintLayout>
class PlaceHolder1Activity : AppCompatActivity() {

    override fun onCreate(savedInstanceState: Bundle?) {
        super.onCreate(savedInstanceState)
        setContentView(R.layout.activity_place_holder1)

        iv1.setOnClickListener {
           place_holder.setContentId(R.id.iv1)
        }
        iv2.setOnClickListener {
            place_holder.setContentId(R.id.iv2)
        }
        iv3.setOnClickListener {
            place_holder.setContentId(R.id.iv3)
        }
    }
}
PlaceHolder를 이용한 또 다른 예제 입니다.
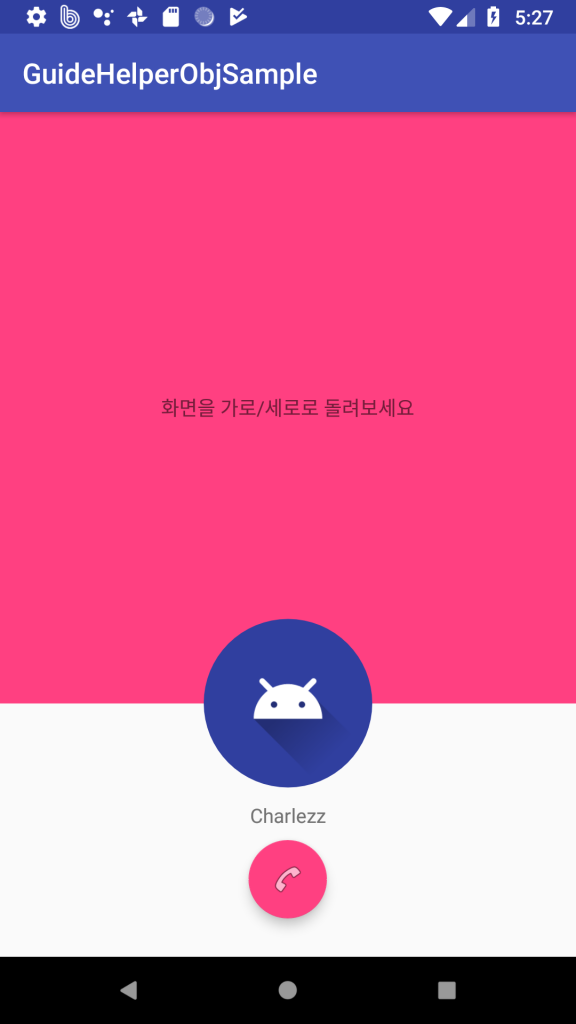
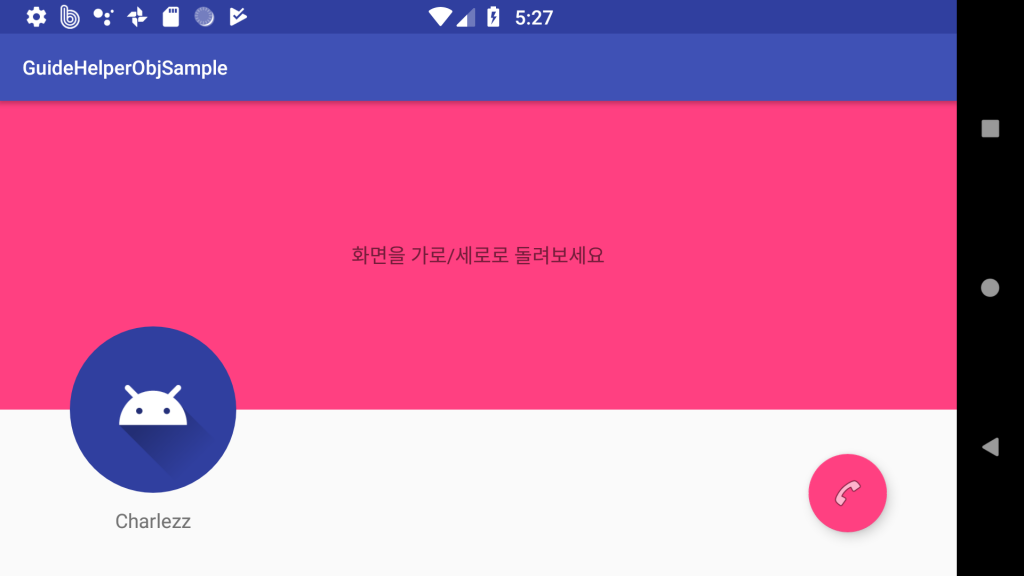
같은 레이아웃이지만 Placeholder를 이용하여 레이아웃을 재배치 하였습니다.
해당 소스는 github에서 확인 가능합니다.
6개의 댓글
knoow · 2019년 8월 22일 4:05 오후
잘봤습니다~
Charlezz · 2019년 9월 4일 9:05 오후
감사합니다
someviewers · 2019년 12월 12일 9:13 오후
첫 사진 몇개가 엑박이에요 ㅠㅠ
Charlezz · 2019년 12월 16일 9:59 오후
서버에 문제가 좀 생겨서 이미지가 깨졌습니다.
현재는 수정된 상태입니다.
마가렛 · 2020년 7월 15일 4:43 오후
님은 천재입니다
Charlezz · 2020년 7월 16일 10:40 오전
ㄷㄷㄷ 감사합니다 🙂